Tuesday, February 5, 2013

Mint Chocolate Chip Cheesecakes


So. I tend to do things (cooking/baking things) without worrying about measuring. I guess I figure that I've been doing this long enough to "feel" what a teaspoon is, right? :)

I decided to make mini cheesecakes for my "big game" party. I was going to divide the batter and do something like a mocha-chip cheesecake, and maybe a cinnamon/nutmeg cheesecake with a (GF) snickerdoodle crust. I had PLANS.

Then I did my "usual" mini cheesecake recipe. I had two 8oz packages of cream cheese (which were quite softened - as they'd been sitting out on my counter for a few hours) thoroughly beaten in the bowl. I added 1 egg to it. Again, the beating. Then 2/3rds C white sugar. Things were looking good. 

I reached into my spice cabinet, whipped out a bottle of extract, and started my pour. BUT WAIT! It was NOT vanilla extract- which, for the record here, is the only kind of extract I've ever, EVER had in my spice cupboard. Ever. Seriously. Until recently, when I asked my husband for a bottle of mint extract. And I'd just dumped about 1 1/2 tsp peppermint extract into my cheesecake mixture.

*sigh* .....

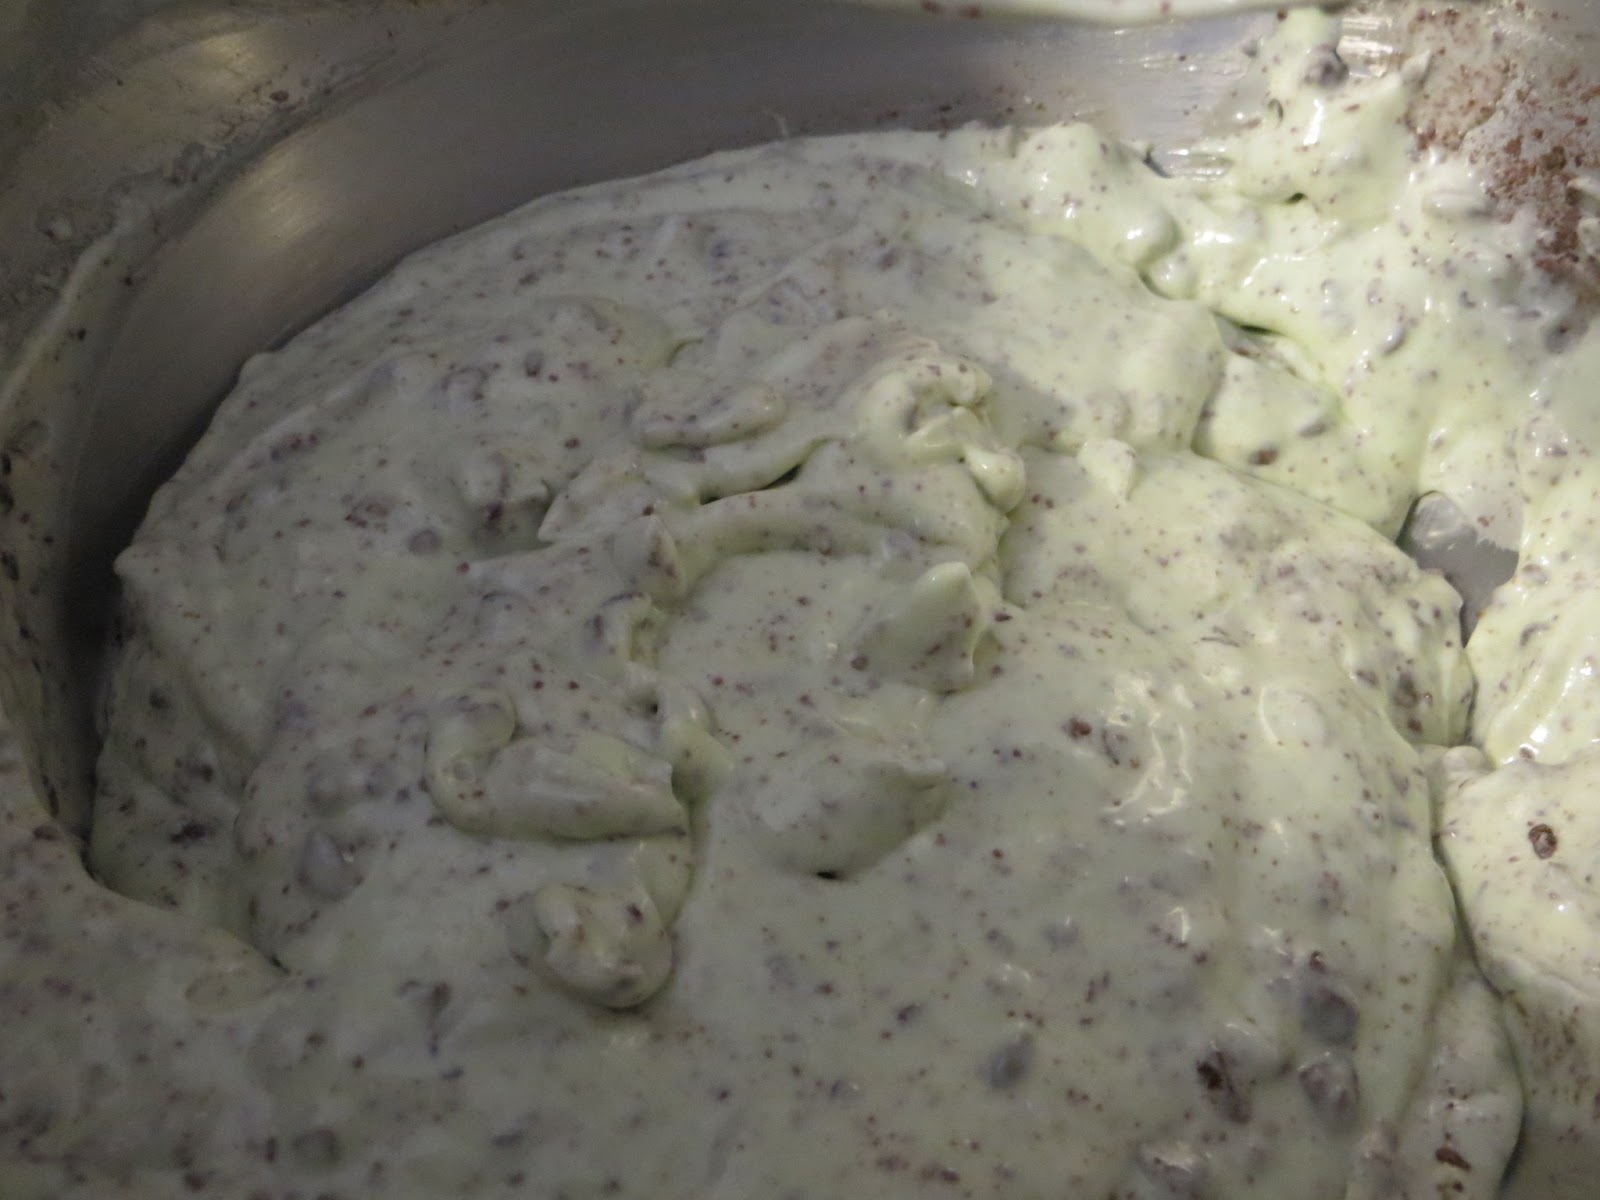
I had a crazy moment where I imagined tossing the whole bowl into the garbage, because I couldn't figure out how "mint" and "cheesecake" went together... but then!!! I stared deeply into my mixing bowl and realized- of course mint goes well with creamy! Look at peppermint patties! Think of mint chocolate chip ice cream! Creamy mint can SO be done.

And done it WAS. By me. ;) I realized that the color was ALL WRONG, so I added 3 drops green food coloring, then I tossed about 2/3 cup dark chocolate chips (half-pulverized in a food processor) in, mixed some more- and yeah.


To make life slightly easier, I poured the mixture into a large ziplock-type bag, then cut out a corner- makes pouring into mini muffin tins so much easier!!!


Baked at 350 for 14.5 minutes (give or take a minute or two)-in a parchment paper-lined mini muffin tin, - and HOLY MOLY!!! It was like mint chocolate chip ice cream in cheesecake form!!! I consider that a WIN!!!


Saturday, January 5, 2013

Company Dinner - Braised Pork Roast

(Mod from- nothing, really)

I should tell you something- I don't measure. But I'm going to do my best to eyeball accurately. I measure some when I'm baking- just because baking is so complicated- but cooking? Cooking is something that should be done by feel, I think.


So- company dinner (for four), with leftovers (because leftovers make lunch on Saturday so much easier!)  - We have a braised pork roast with apples and onions, roasted carrots, potatoes, and Brussels sprouts, and mustard sauce.  I was the only one at dinner who likes Brussels sprouts, but they are so good, and they looked so nice on the plate. I always like to have a colorful plate.

Braising is one of my favorite ways to cook meat (I braise everything- chicken, sausages, pork) - because it makes the meat so flavorful and so tender! Here's part 1 of company dinner- the most important part- the meat!

Ingredients:

1 pork roast (mine was a pound and a half)
2-3 onions, cut into quarters
2-3 apples- seeded and quartered
Worcester Sauce (I used 5 generous shakes)
Balsamic vinegar (about a quarter cup)
2 cups beef broth (or 2 cups water with beef bullion cubes OR better than bullion, which is AWESOME and much more affordable than buying cans of broth)
mmm.... thyme-ey....

Salt, pepper, thyme, oil- I like either grapeseed oil or good olive oil. Grapeseed oil is very plain and won't add any flavor, but it has a really high smoking point, and I really love using it.

Heat your oil in a cooking vessel (I use a dutch oven. LOVE my dutch oven. It's my favorite thing to cook in), and while it's heating, liberally dose your meat with salt (coarse salt- Kosher salt or sea salt), black pepper, and thyme. When the oil is hot, toss your meat in and let it brown. Brown all the sides. Mmm. When it's nicely browned, and the oil is popping and it smells amazing, add your vinegar, and Worcester sauce  (this will result in an explosion of noise and smell!) - make sure to scrape the brown bits off the bottom of your pot- and then add your beef broth.


Toss in the apples and onions, cover it, turn it down to low- and forget about it for a few hours. The really fantastic thing about the braising is that if say.... you think your company is coming for dinner at 6, and then someone texts you and says, "Oh wait- we're going to be there at 7:30, sorry," - you can just keep your stuff in the pot on super low and roll with it. :)  


So yeah- that's it. You could add your potatoes and carrots to this, and cook everything in one pot.  Cook at least an hour and a half- and up to 4 hours or so. The end result is a gorgeously cooked piece of meat, which will practically fall apart when you cut it.  Enjoy!


Tuesday, January 1, 2013

Mint Hot Chocolate Brownies

(Mod from - nothing really, just rolled with this one)


Mint. Hot chocolate. BROWNIES.


This was actually amazingly easy- I had to make something for a Christmas Eve party, and I totally failed to achieve anything on the 23rd, and on the 24th I had to work. I managed to come home, make these, give my toddler some love, get her and myself dressed, and pack a diaper bag- in about an hour. Okay, not super timing- but I whipped these up, so that must count for something!

First - Preheat the oven to 350

Ingredients:

Brownie part-
1 box Betty Crocker gluten free brownie mix
2 eggs
1/2 stick butter, melted
about 2 tbs cream or milk

Mix all that stuff together, adding the milk or cream so that it's not quite as thick as normal.

Pour into a parchment paper lined pan (I used a 7x11 Pyrex glass dish).

Mix in a half cup of mini marshmallows. Mmm.


Gooey part-
1 brick softened cream cheese (8oz)
1/4 cup sugar
1 egg
1/2 tsp peppermint extract

Whip all that stuff up with a hand mixer or in a stand mixer for a few minutes, till it's smooth and fluffy.

Swirl into the brownie mix with a few knives, and if you're good, you'll get a nice marble effect. If you're me- it will look just eh- but still yummy.

Bake for about 35 minutes- you want to bake it a bit longer than the box says, but take it out when it still has 3-5 minutes left- this is REALLY variable too- every oven really is different. 

Topping-
Crush up 3-5 candy canes
Chop some chocolate- a Hershey bar, some kisses- whatever you have on hand

Sprinkle on the topping and put back in the oven. Bake for another 3-5 minutes. The candy cane and chocolate will melt- it will look super pretty. 

After you take it out, you can sprinkle on more candy cane (which won't melt) to make it look even prettier. 

If you have time, let these cool for as long as possible. I'd stick them in the fridge for at least a few hours if you want to cut them and be able to hold them. :) If you aren't concerned- eat them warm with a fork. They are MELTY and amazing! 

The combination of mint, cream cheese- marshmallows- chocolate- OH!!! The middle might seem super gooey if you don't let them set and cool- but it's still cooked and oh so messy and yummy!


Wednesday, December 19, 2012

Pumpkin Eggnog Coffee Cake


Okay, let's dive right into this, huh?
This past weekend I wanted a coffee cake- but I wanted it to involve pumpkin (a great cold weather favorite of mine) and I also had an unopened carton of eggnog in the fridge that needed opening and using- stat

I couldn't find what I wanted, so I invented. 

Let's get started!

Preheat the oven to 375, and break out a can of pumpkin. Not pumpkin pie filling, just straight up plain pumpkin. 


Ingredients- 

DRY: 
1 box gluten free Bisquick
1/2 cup brown sugar
2 tsp cinnamon
1 tsp nutmeg
1/2 tsp cloves or ginger (optional, or you can use both) 

Mix the dry ingredients together. Easy peasy!

WET:
4 eggs
1 1/2 cup eggnog (OR you can use about a cup of milk)
1 stick mostly melted butter
2 tsp GF vanilla extract

Mix wet ingredients together, making sure to beat the eggs well, then stir in the dry stuff. 

Pour about 2/3rds the mixture into a greased or cooking-sprayed glass 9x13 baking dish. Spoon the can of pumpkin on top, then sprinkle on some more cinnamon - if you really like cinnamon. I do, so I recommend it. 

Pour/drizzle/spoon the rest of the baking mix over the pumpkin, and smooth it carefully with a spatula so it's mostly covered. If you're really bold, sprinkle some more cinnamon (or better- cinnamon sugar) on top. Bake for about 25 minutes-half hour. 


Oh. WOW. The cinnamon sugar gave it a nice sparkle! And it tasted good, but needed a bit more- so---- glaze!

GLAZE:

Put about a cup of powdered sugar in a bowl, then slowly whisk in eggnog (and a sprinkle of nutmeg if you're going for real, great eggnog flavor) till you get a good consistency. Pour over the coffee cake. Drool. Then eat some.


This is AMAZING!!! It's like... eating pumpkin pie and drinking eggnog for breakfast. And cause it's called "coffee cake," it is socially acceptable to eat first thing in the morning (or any time of day)!

SUPER EASY, quick, affordable, gluten-free. That's the way things should be.